I think I need a Spring Ruffle Top.
Some people I know might need Coffee Cozies.
Who doesn't need a Rice Heat Therapy Bag?
I really, really need to make this skirt, bad.
Off to do some creating. What do you want to make?
Showing posts with label tutorial. Show all posts
Showing posts with label tutorial. Show all posts
Wednesday, April 21, 2010
Thursday, April 1, 2010
Feather Flair DIY

Hi friends! Today I shall teach you how to create fun feather accessories for your hair or ears. I don't have a super fabulous picture of the finished product as I am on day 2 post shower, which isn't a good day for loose hair shots.

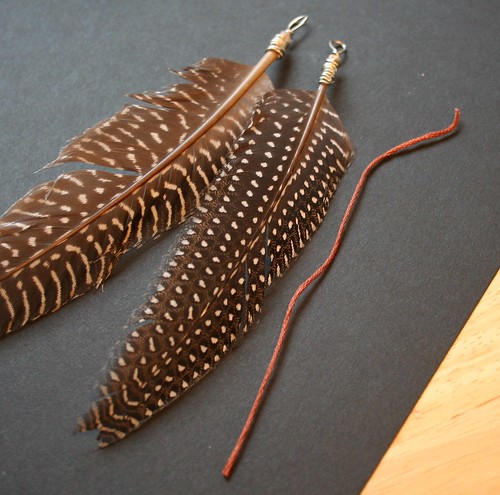
Materials needed:
Alligator clips and/or earring hooks
Feathers- I got mine in a bag at hobby lobby, but I heard fly fishing places are where the good feathers are at. I'll be checking one out next time I'm able to do so.
Wire- I used Craft Wire from Walmart
Embroidery floss- I used brown so it would blend in with my fur
Needle Nosed Pliers
Wire cutters- I'm using my Dad's here, but I don't have any at home. I just used my junk scissors.

Step One: Cut a hole in the box. Just kidding. :D I cut a piece of wire about 6 inches long, but sometimes that's too short. I'd go a couple inches longer. You can always cut off the extra.
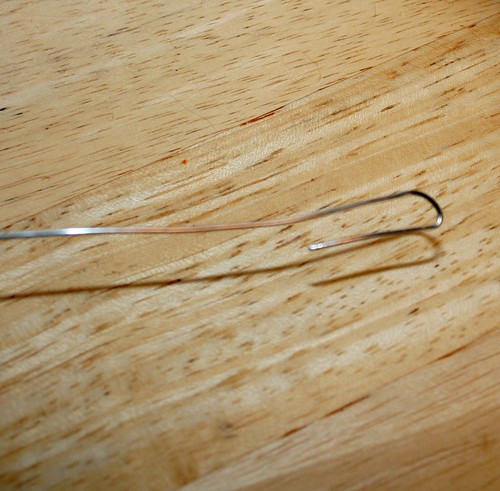
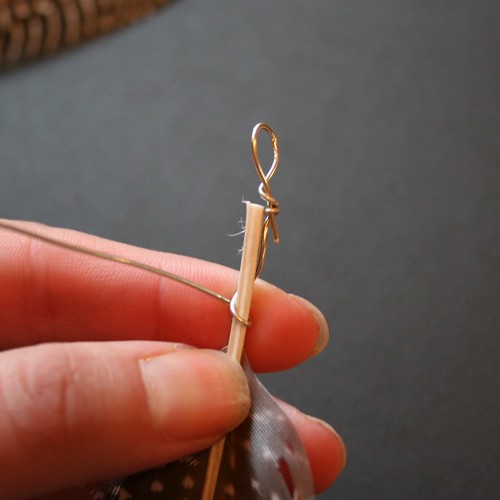
This picture sucks, but it was hard to focus on the wire. I took the pliers and bent it over about half an inch.
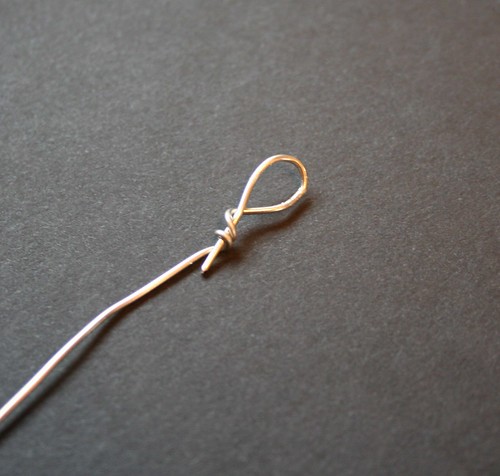
I gave this a couple twists to secure a loop on the top.
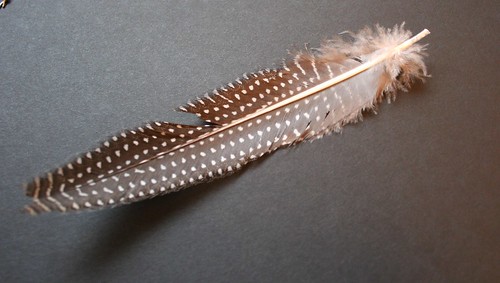

If your feather has furry stuff on the bottom, rip it off. Just do it, it's easy! You need room on the end to wrap the wire, so if your whole feather is furry, just do between half an inch to an inch.
Then I lined up the end of the feather with the bottom of the loop.
Then I pulled the extra wire down a bit and started twisting it on.
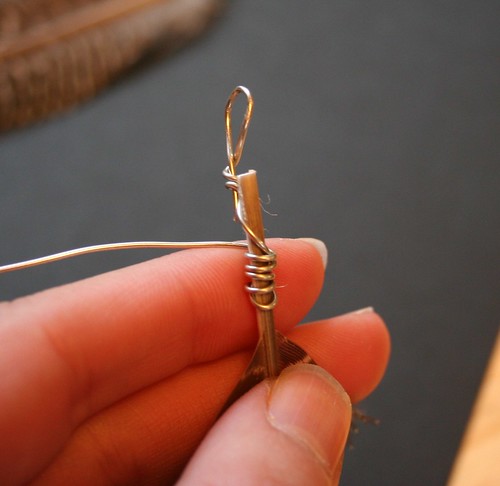
Start wrapping the wire up to the top.
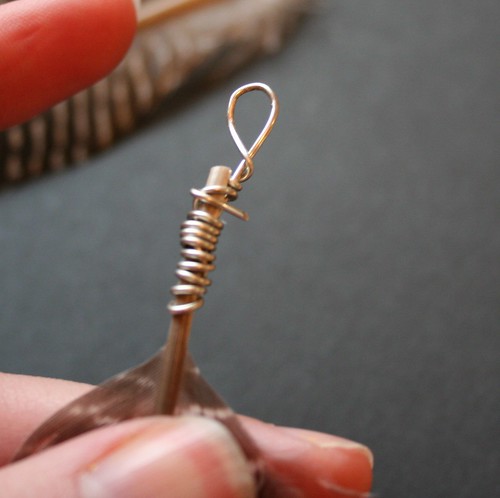
I like to make sure the wrap covers the first end of the wire on the loop (does that make sense?) to secure it. I used the pliers to bend the end down, and then I used them to gently squeeze up and down the wire coil to make sure it's clamped onto the feather. We don't want that feather coming out!
Looks good, right?
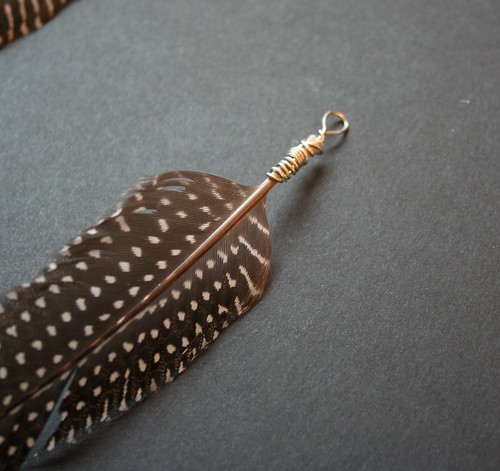
Cut a piece of your embroidery floss.
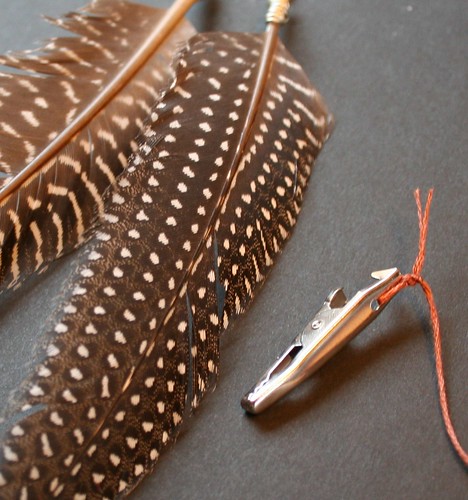
Tie the floss onto the alligator clip. I tied it in 4 or 5 knots just to make sure it's secure. You could probably use a dab of glue.
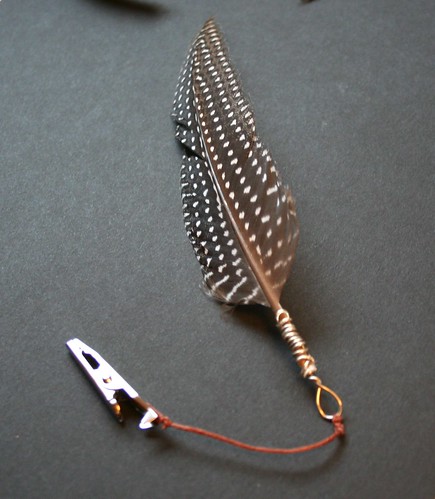
Tie the floss onto the feather loop using the same method. If your feather is really long, don't make the string to long. Hold it up to your hair to measure if you like, but I've learned that keeping the string short is key.
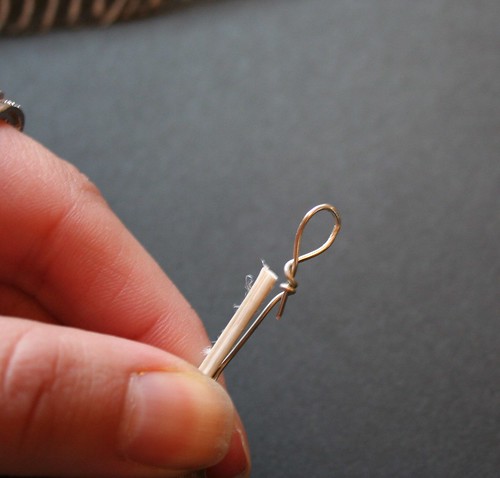
You can also skip the floss and attach the loop to an earring hook. They look super cute as earrings too!
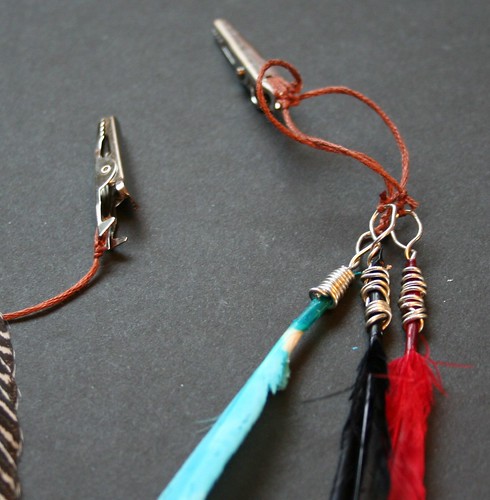
I like to tie 2 or 3 small feathers on one clip. You can wear these one the top of your head or underneath to hang down by your neck. I'll have to get more action shots on another day when my hair is more fresh.
I'm no pro at this feather and wire business, but I just thought I'd share. My friend Brooke asked me to make her some hair feathers like this for her birthday, and this is what I came up with. If you use this tutorial please share so I can see how awesome yours turned out!
Thursday, March 12, 2009
Cereal box packaging tutorial
I know I've seen this type of packaging elsewhere on the internet, and now that I know what the government does to people with good ideas, I'm glad it wasn't my original good idea!
I love doing this. We all know that the only thing better than recycling is reusing, and I love this method. The box gets reused, and once it reaches its destination I can only hope the recipient will recycle it.
So here we go..
First you need to find a box. Cereal boxes are my favorite, although cracker boxes are good too. I've been saving almost every thin cardboard box that's around for making packaging.

I use a lot of these awesome Honey Bunches of Oats knock off boxes because that's what I'm digging right now. Anyway, the first thing I do is open the bottom flaps of the box. Then I cut up one corner. I cut up the one with the seem where the box was glued together to eliminate bulk when I'm sewing it.
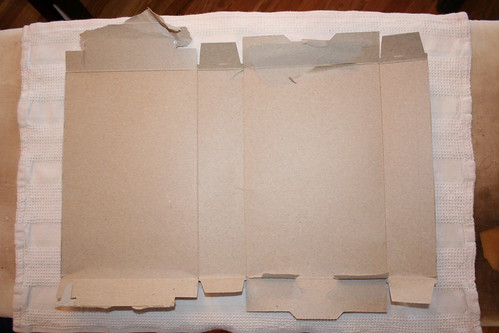
Now your box should look like this. Cut off all those flaps that used to keep the box closed.
That looks better, right?
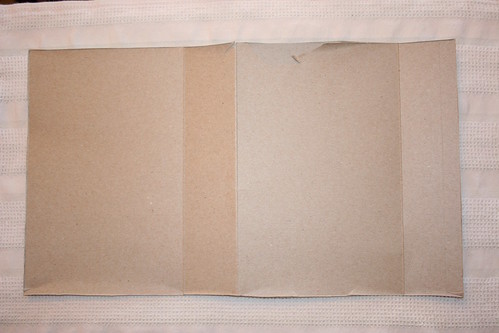
See that score line in the middle? Fold the box there printed sides together.
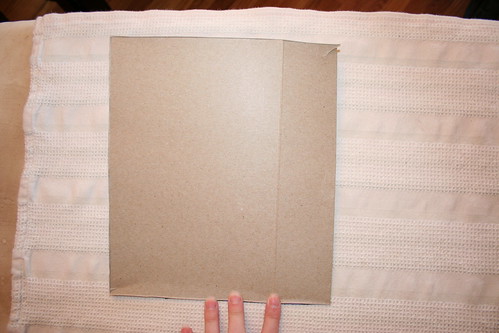
Ta-da! Now all you have to do is sew it! The folded side doesn't really need sewing, so I start on one side of the folded line and sew a zig zag stitch that closes two of the open sides. Make the stitch a bit long. If they are too short the holes perforate the cardboard, and it will tear.
Remember that paper and cardboard will dull the crap out of your sewing machine needle. I always keep a couple old, no good for sewing fabric needles in my pin cushion. Then I just pop one of those in for these bad boys. No use wasting a perfectly good needle unless the one in your machine is on its last legs.
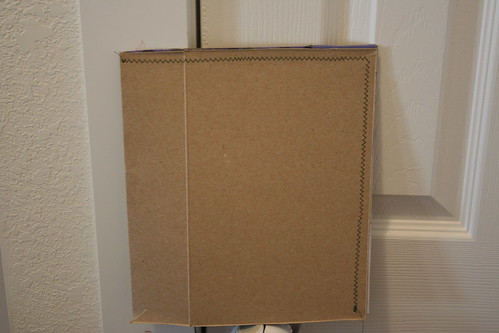
Now you have this. At this point you can throw it in your pile of envelopes if you're not sending anything out today. Otherwise I like to first write addresses on it and then pop my item in it. Then I sew up that last side.
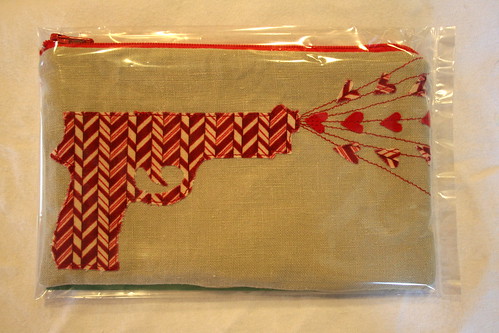
Item, ready to be cozy in its shipping vessel.
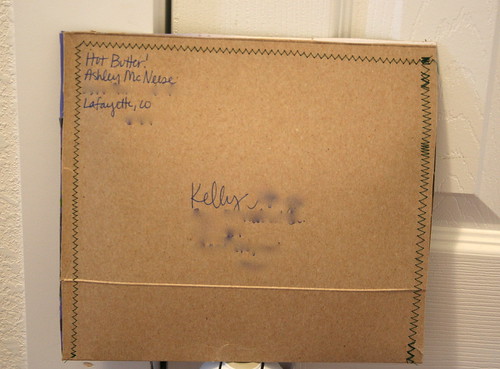
The glorious finished product. Addresses blurred out to protect the guilty. By guilty I mean my friend Kelly who is in Italy as we speak. Consider me jealous.
Now you just have to go to the post office. Maybe wear a shirt that says "this was not my good idea, please don't abduct me government!"
You can always do some awesome decorating to your box. See that box of crayons your toddler left out? You could grab some and draw something silly that makes you embarrassed about your art skills. Or maybe you have good art skills? If you do, don't be embarrassed. Either way, send it with pride!
I love doing this. We all know that the only thing better than recycling is reusing, and I love this method. The box gets reused, and once it reaches its destination I can only hope the recipient will recycle it.
So here we go..
First you need to find a box. Cereal boxes are my favorite, although cracker boxes are good too. I've been saving almost every thin cardboard box that's around for making packaging.
I use a lot of these awesome Honey Bunches of Oats knock off boxes because that's what I'm digging right now. Anyway, the first thing I do is open the bottom flaps of the box. Then I cut up one corner. I cut up the one with the seem where the box was glued together to eliminate bulk when I'm sewing it.
Now your box should look like this. Cut off all those flaps that used to keep the box closed.
That looks better, right?
See that score line in the middle? Fold the box there printed sides together.
Ta-da! Now all you have to do is sew it! The folded side doesn't really need sewing, so I start on one side of the folded line and sew a zig zag stitch that closes two of the open sides. Make the stitch a bit long. If they are too short the holes perforate the cardboard, and it will tear.
Remember that paper and cardboard will dull the crap out of your sewing machine needle. I always keep a couple old, no good for sewing fabric needles in my pin cushion. Then I just pop one of those in for these bad boys. No use wasting a perfectly good needle unless the one in your machine is on its last legs.
Now you have this. At this point you can throw it in your pile of envelopes if you're not sending anything out today. Otherwise I like to first write addresses on it and then pop my item in it. Then I sew up that last side.
Item, ready to be cozy in its shipping vessel.
The glorious finished product. Addresses blurred out to protect the guilty. By guilty I mean my friend Kelly who is in Italy as we speak. Consider me jealous.
Now you just have to go to the post office. Maybe wear a shirt that says "this was not my good idea, please don't abduct me government!"
You can always do some awesome decorating to your box. See that box of crayons your toddler left out? You could grab some and draw something silly that makes you embarrassed about your art skills. Or maybe you have good art skills? If you do, don't be embarrassed. Either way, send it with pride!
Subscribe to:
Posts (Atom)